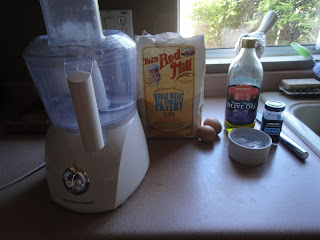
Monday, April 29, 2013

Oatmeal Coconut Jam Bars

I don't bake much.... at all....

There is something about having to be precise that just does not go well with me. I CAN do it if necessary, and have done it with success....but it is not my favorite.

I am getting ready to go on a quick vacation so I really want to make sure that I use up everything perishable. I hate when things go to waste.
In that spirit, I have tons of fresh blackberries I need to use that, much to my dismay, no one else in my house loves - they will eat them by force but not their first choice.
I wanted to make sure to use them up, but I knew I was not going to be able to eat all of them alone so I wanted to see if there was something I could come up with... to the internet I went.

I finally found a recipe that looked like it would be yummy and I had everything i needed.
The white flour, the quantity of sugar and the store bought sugar filled raspberry jam it called for were not things I really wanted to use though.

Indulgence is ok. In my life it is actually required :) I am not one of those wow this fresh fruit is just like having a slice of chocolate cake people....um.... whoever said that lied... bad...
I do indulge, its actually quite the norm here, but I think if the food can taste just as good or better and use healthier ingredients why wouldn't you?!

The original recipe calls for sweetened coconut, bleached white flour, a full cup of sugar and store bought sugar filled jam.
My recipe uses unsweetened coconut, whole wheat pastry flour, 1/2 the sugar and fresh berries cooked down into a thick jam like yummy sauce. But make no mistake, they are still an indulgence - there are 1 and 1/2 sticks of butter involved here :)

OH, and it tastes FABULOUS :)
golden, toasted, unsweetened coconut


blackberries and strawberries reducing away

all thickened up, no additives, no sugars

dough after butter addition, but before oats and coconut... all in the food processor

right out of the oven

close up of the bubbly, toasty, goodness
 
Oatmeal Coconut Berry Jam Bars

1 1/4 cups unsweetened coconut flakes - toasted at 375 degrees until golden brown (about 8 minutes, but watch CAREFULLY as it can burn fast)
1 1/4 cups whole wheat pastry flour
1/2 cup brown sugar ** see note at bottom **
1/2 teaspoon salt
1 1/2 sticks cold, unsalted butter - cut into pieces but kept cold
1 1/2 cups plain rolled oats (not instant)
2-3 cups fresh berries of your choice - you want this to cook down into about 1.5 cups of jam so you may need more/less fresh berries depending on the size, type of berry you use.
up to 1/4 cup raw honey (may not be needed)

Preheat oven to 375 degrees and toast coconut

In a saucepan over medium heat, add the berries and up to 1/4 cup of honey; 1 tablespoon at a time. Depending on the sweetness of your berries, you made not need any of the honey. As the berries cook down they will concentrate and become sweeter. Cook until a thick jam has formed, set aside to cool. This will take anywhere from 10-20 minutes depending on stove, pan, and berries.

Combine flour, sugar, salt in the bowl of a food processor, process until combined. Add in butter and process just until a dough begins to form. Add in oats and 1 cup toasted coconut - pulse a couple times and then transfer to a bowl to combine. Knead until everything is incorporated but do not handle too much or else the butter will melt. Set 3/4 cup of the dough aside.

Press remaining dough into pan until flat. I have a strange 8 1/2 x 11 pan that I used but you could use a 9x9 or even a 9x13. You would need to add more time to a 9x9 pan and subtract some minutes from the 9x13. Add jam on top and top with 3/4 dough you set aside as well as the 1/4 cup of coconut you have left. Spread out the dough/coconut mixture carefully on top of the jam.

Bake about 30 minutes watching to make sure the coconut on top does not burn.

Here is the hardest part...let cool...ugh!!
You have to let these babies cool... unless you want your homemade yummy jam pouring out all over youself so that you singe your arms, hands and face (cough...ahem... i would have NO idea what this would be like). Cool about 20 minutes at room temperature, then cut into squares (I was able to cut mine into 16 small squares).


** I normally try to avoid using straight sugar/brown sugar and try to stick to raw honey and maple syrup as sweeteners. I tried these once with honey and here is what I found. The temperature had to be lowered, the flavor was much different, the moisture level was weird and I had a hard time with it. I am sure many of you are much better with subbing in other ingredients, so feel free to let me know if you do.

Happy Eating...

Clam Craving...in the Desert...

I have said this before, but I LOVE seafood!
One of the perks about growing up on the East Coast is the fresh seafood so readily available...

flash forward a few too many years and find yourself smack dab in the middle of a desert... and a seafood craving hits.... what do you do?!

You jump in the car, drive 20 minutes to the closest Whole Foods and grab a pound and a half of their wild caught, fresh from that day little neck clams.

These are some really really good clams people. They actually rivaled some of the best ones I had back home, and that is saying something!

Big, Meaty, Tender...and chock full of flavor, and all ready in under 20 minutes! Whoo Hoo!!


                   LittleNeck Clams
in a brown butter, white wine, garlic sauce


1.5 pounds fresh, wild caught littleneck clams (about 8-9 big ones)
1/2 cup white wine
1/2 cup water
3 garlic cloves, minced
4 tablespoons butter
1 tablespoon capers, drained
1 tablespoon lemon juice
2 slices lemon
1 teaspoon red pepper flakes
1 teaspoon dried thyme
1 teaspoon dried basil (or 1 tablespoon fresh basil chopped)
* I added some olives to mine just because i like olives, they are not necessary *

Wash clams in a big bowl of water, scrubbing clean, dry off
In a deep pan or pot, bring lemon slices, 1/4 cup wine and 1/2 cup water to a boil
Add clams, reduce heat to a simmer, cover and cook until all clams have opened (about 8-12 minutes) If clams are not open after 13-15 minutes, discard
Once the clam has opened, remove from pan and set aside until all other clams open
Once all clams have opened and are removed, drain pot/pan, set back on burner on medium high heat
Add butter, garlic, herbs, red pepper flakes and saute until butter turns light brown (watch garlic carefully, do not let it burn)
Add in remaining 1/4 cup wine, capers, lemon and clams
cook about 3 minutes, plate clams, pour sauce on top
Best served with some crusty bread to soak up all the sauce

Happy Eating...

Saturday, April 27, 2013

Herbed Lamb Burgers...

I've never eaten lamb. Well before last night that is...

I had this mental image of a poor lamb and I just could not do it. It seemed so sad... I'm kind of a sap like that. All I hear in my head is "Mary had a litle lamb, little lamb, little lamb"...

With the decreasing supply of really good, natural, clean meat available I have been forced out of  my comfort zones with eating. We eat a lot more vegetable based meals and a lot less mainstream red meat.

I was perusing my local sprouts store when I saw this great display for 100% grass fed lamb, and it was just a few cents more per pound than the ground beef. I figured I may as well give it a try.

Change is good. Right?! Please tell me it is...

These were actually really good burgers, a nice change. I had to make myself think they were regualr old hamburgers though... Not becuase they didn't taste amazing, but because all i could hear was "Mary had a little lamb" playing in my head...

The flavor was not too different than a traditional burger and it was super moist and tasty.

The real success of this meal, my 1 year old ate almost 2 of these babies, and my 5 year old scarfed 1 and asked for more. Now that is a success in my mommy book :)

Herbed Lamb Burgers
(Makes about 4 regular sized patties or 6 sliders)
1 pound ground lamb (if they have organic or grass fed - go for that)
1 egg, beaten
1 tablespoon water
2 garlic cloves, minced
1 shallot, or 1/2 of a small white onion, grated
2 teaspoons dijon mustard
1 tablespoon red wine vinegar
2 teaspoons dried oregano
1 teaspoon dried cumin
1 teaspoon dried rosemary
1 teaspoon dried coriander
2 teaspoons fresh basil, chopped
1 teaspoon fresh dill, chopped
1/2 teaspoon salt
1/2 teaspoon pepper

In a bowl, combine lamb with the beaten egg, water, mustard, vinegar, garlic, shallot or onion. Use your hands to gently incorporate the ingredients. Add in the spices and herbs and gently fold together once more.
Form patties and refrigerate at least 45 minutes. You can skip this step but you may notice that your burgers start to fall apart once cooked. The chilling time helps them bind together. If you find you do not have time to refrigerate, you can add in about 1/4-1/2 cup breadcrumbs to help with binding, but chilling is best.

Heat a cast iron skillet (or other heavy bottomed pan) over medium high heat, add in a drizzle of olive oil, until pan is pretty hot, but oil is not smoking.
Add burgers, in batches if necessary to prevent crowding, press your thumb into the top to create an indentation, and cook about 4 minutes. Carefully flip burgers, cover pan, cook an additional 2-5 minutes depending on your desired level of doneness. 6 minutes will normally produce a lamb burger cooked medium.

Remove, build burgers, don't forget to use a homemade bun Recipe on this blog HERE, and some amazing feta/yogurt dip. (Recipe Follows)

Feta/Yogurt Dip
1 6 ounce container plain greek yogurt
1/3 cup feta cheese, crumbled
1 clove garlic, minced
1 tablespoon shallot, minced
1 teaspoon red wine vinegar
1/2 teaspoon lemon juice
1 teaspoon dried oregano
1 tablespoon fresh dill, chopped
salt and pepper to taste

In a bowl, mix all ingredients, cover and let chill 30 minutes to let flavors incorporate.


Happy Eating....

Friday, April 26, 2013

100% Whole Wheat Crusty Bread

There's not much like the smell of fresh baked bread...

If anything about this recipe is hard, it is not diving head first into the oven to tear a piece of this bread off before it is ready. It smells THAT good.

Light airy on the inside, crusty and golden on the outside. Before now, it seemed that you only could get that in bread that had at least some white, bleached, stripped of all goodness flour.

Not Anymore!!

This bread is 100% whole wheat! And Light! And Airy! What?!

Take a look at these beauties


Yup, those are big old air pockets in there, with 100% whole wheat bread. Yum!!

This is not a recipe you can throw together, you have to allow about a day and a half before you can eat this baby, tear, i know.

Let's get to it then, I mean its a day and a half here!

This recipe will make 2 small crusty dough rounds, 12 small rolls, or 1 small round loaf and 6 rolls.

Here is one thing to know about bread making (which I am NO master of in any way), measuring will make it or break it. Weighing your dry ingredients is best, it produces the best quality bread because you know exactly how much you are using.
If you have to use measuring cups the quality can actually vary greatly... did you scoop the flour into the cup with a spoon, then gently level off with a knife careful not to pack it down (this is the correct way) or did you just scoop it up and use your hands to pack it in. Those two methods will produce different amounts of flour which will mess with the quality of your bread...

If you have a food scale, use it :)

Whole Wheat Crusty Bread
16 ounces (or 3 and 3/4 cups) - white whole wheat flour
1 ounce (1/8 cup) - Vital Wheat Gluten (I was able to find my bag at a regular chain grocery store)
Just over 1/2 package -  active dry yeast (about 3/4 teaspoon)
12 grams (3/4 tablespoon)  - salt
2 teaspoons raw honey or 100% pure maple syrup, not too warm
2 cups water (you can use a measuring cup now)
**optional herbs, sauteed cooled garlic/onions - this are highly recommended though
 
 
  • Mix all dry ingredients in a large bowl and whisk them up (including herbs and/or garlic/onions)
  • Add in honey or maple syrup
  • Add in water 1/4 cup at a time, mixing with a wooden spoon between each addition
  • Mix gently until no more dry spots remain
  • Cover your dough tightly and allow to sit out on counter 12 hours
  • Refrigerate an additional 12 hours
  • Dough should have doubled, should be flat at the top and should have bubbles on the surface
  • Place dough in stand mixer and using dough hook, knead for 6-8 minutes on medium speed (you could also do this by hand but dough is sticky, and will stay sticky making it difficult. You do not want to add more than a few tablespoons of flour while kneading)
  • After dough has been kneaded, cut dough in half, fold over onto itself a few times and shape into small rounds (or buns or both). Smooth out top and tuck ends under. Don't overhandle dough.
  • Place dough on flour or cornmeal dusted parchment paper. Let rise 30 minutes, checking occasionaly that dough is not touching any other dough or else it will stick
  • Place pizza stone or inverted baking sheet in oven and preheat oven to 450 degrees for 20 minutes
  • Place an additional baking sheet on bottom rack under the pizza stone/inverted baking sheet
  • After dough has risen the 30 minutes on the parchment paper, make 2 or 3 slashes in the top, slide the dough (paper and all) onto pre-heated pizza stone or inverted baking sheet.
  • Pour warm water into the baking sheet on bottom rack. The water should be at least halfway up the sides of the baking sheet (the steam created will create the crusty exterior of the bread, should you not want a crusty exterior you can skip this step)
 
For Loaves
Bake 30 min, reduce oven to 350 degrees bake additional 23 minutes
Remove, cool
 
For Buns
Bake 20 minutes, reduce oven to 350 degrees bake additional 20 minutes
Remove, cool

ENJOY :)
 
Happy Eating...
 

Wednesday, April 24, 2013

Pan Seared Salmon with Tropical Salsa

 
I love the beach. No really, I LOVE the beach.
 
There is something so calming and relaxing about sitting on the beach watching the waves wash in and out. The smell of ocean air, the breeze... wish you were there yet?
 
Me too!
 
I was feeling nostalgic for the ocean one night so I thought I would make a tropical type of salsa. By the way, as yummy as it was, it was no replacement for the ocean :/ But it WAS yummy.
 
 
So I hope you whip this little meal up and if you are especially lucky enough, enjoy it on the beach, but if not, then enjoy it with a fan, a sound machine set to ocean waves, closed eyes and a tongue dancing with the tropical flavors of the salsa.


Pan Seared Salmon with Tropical Salsa
(serves 2)
2- 5 ounce portions salmon (wild caught is best), if frozen make sure it is thawed completely and patted dry
1 small head purple cauliflower, about 2 cups of florets
1.5 cups whole milk, half and half or heavy cream (you can use lower fat milk, it just wont be as creamy)
2 cups trimmed green beans (mine were a mix of green and yellow, use what you have)
1/2 mango, diced
1 small shallot, diced
2 garlic cloves, minced
1/2 large red bell pepper, diced
1/2 cup pineapple, diced
1 teaspoon orange juice
Juice of 1 heavy lemon
3 tablespoons butter
salt, pepper, olive oil

In a small bowl combine mango, shallot, red bell pepper, pineapple, 1 garlic clove, orange juice. Season with salt and pepper and add just a tiny drizzle of olive oil.
Cover and refrigerate at least 20 minutes.

In medium saucepan add milk/cream, cauliflower, and some salt and pepper
Cook until cauliflower is completely tender, breaking apart (about 15-20 minutes)
Transfer cauliflower and liquid to high speed blender (a food processor or hand masher works in a pinch, but texture will be a bit more lumpy), add butter and let soften for a minute or two, and blend until completely smooth, taste and season as necessary

Heat heavy bottom pot to medium high
drizzle olive oil onto fish, rub in, season with salt and pepper and hearty squeeze of lemon juice
Cook about 3 minutes, gently flip over, re-season with salt and pepper and cook an additional 3-5 minutes or until done to your liking

Heat less than 1 inch of water to a rolling boil in a saucepan, add beans, cook until beans are just tender.
Drain liquid, return beans to pan, reduce heat to low add 1 tablespoon butter, 1 teaspoon lemon juice, 1 clove garlic and cook until beans are coated, and garlic is fragrant, light brown but not burnt.

Plate as you like, enjoy the tropical tastes as you spoon the salsa over the salmon.

Happy Eating...

Tuesday, April 23, 2013

Simple...but Beautiful

Simple.

What a word.

Pure, unadulterated, innocent... but for me, sometimes i view simple as not being good enough. It seems everything of value needs a million steps or pieces or dollars.

Not this dish.
This dish is humble, simple, pure....and Awesome!!

And it, truly, could not be simpler


Simple Filled Pears
(serves 2...or 1 if you dont want to share your pear, and that's ok)
1 Pear (I used a red pear)
1.5 tablespoons crumbled blue cheese
1 small golden beet,roasted and chopped
2 tablespoons chopped pecans
1/2 cup balsamic vinegar

Heat oven to 375 degrees
Wash, dry, peel, slice golden beets
In a small baking dish, combine beets with a drizzle of olive oil plus some salt and pepper
Bake until beets are soft, about 10-20 minutes depending on how thin you slice your beets
Cool and chop into cubes

In a small saucepan over medium, medium-high heat, add balsamic vinegar.
Cook until vinegar reduces and a slightly sticky, thicker syrup remains

Wash and dry pears and cut in half
Scoop out seeds with melon baller or spoon, making a cavity to fill with all the yummies!
Fill center cavity of each pear with golden beets, pecans, and blue cheese.
Drizzle, pour, artfully dot (whatever works in your kitchen) the balsamic glaze on top.

Enjoy the simple pleasures of life...like this pear.

Happy Eating.

Friday, April 19, 2013

A New Kind of Chicken Parm...

This is not your typical Chicken Parm...
it's not fried or topped with cheese...

It's stufffed with cheese and kale instead, and cooked in the sauce, and amazing :)

This is some moist chicken people... I can't stand dry chicken. There is just something about trying to chew dry chicken, kind of like chewing sawdust.
I would imagine, I have no previous knowledge of what chewing sawdust is like.

When I first started to attempt cooking (about the same time I got married..my poor husband!) I overcooked chicken approximately 100 out of 100 times. I was so afraid to serve raw chicken that I would just cook and cook and cook, cut into it to check it, and then cook and cook some more. It was awful. Rubbery, tough, impossible to chew.

And my husband ate it.
Every. Single. Time.
He's pretty great.

I am happy to report (as is my husband) that I rarely overcook chicken anymore. No more sawdust, yeah!

On to the recipe, and some step by step directions to make this yummy new take on the classic chicken, cheese, tomato sauce recipe.

my single larger chicken breast

i pound it flat under wax paper... i dont want to wear chicken pieces

filling... homemade ricotta, spices, chopped kale

roll it all up, seam side down in pan

add some homemade (or jarred) marinara sauce

after letting it rest, slice it up...so pretty!

half portion all plated up and topped with fresh heirloom tomatoes...YUM!
Chicken Parm Redux
(Makes 2 portions)
1 large boneless, skinless chicken breast
1/2 cup chopped kale
1/2 cup -3/4 cup ricotta cheese (depending on chicken breast size)
1.5 teaspoons dried thyme
1 teaspoon dried oregano
1/2 teaspoon salt
1/2 teaspoon pepper
1 cup marinara sauce
1/4 cup freshly grated parmesan or italian blend cheese
1 tablespoon olive oil
*Optional slices of heirloom tomatoes to garnish

Preheat oven to 375 degrees
Pound chicken breast under wax paper until thin, trim up to make one long rectangle
Mix herbs with ricotta cheese and spread in center of chicken, leaving edges free
Sprinkle chopped kale on top of cheese
Roll up chicken, place seam side down in baking dish
Pour marinara sauce around chicken and pour olive oil on top of chicken
Bake 13-16 minutes until chicken is no longer pink, juices run clear, and chicken is moist
Remove from oven, remove chicken to rest on clean cutting board
Return pan with marinara to oven and cook for the 3 minutes your chicken rests
Slice chicken into rounds, admire how pretty it looks

Plate sauce, chicken rounds on top, add more tomato sauce, grated cheese and heirloom tomatoes on top.

Seared Scallops...

I love seafood.
It stems from my growing up in New York and the ability to get fresh seafood pretty much anytime.

Fresh seafood in Arizona....well you know how it goes, "I got some ocean-front property in Arizona, from the front porch you can see the sea..."

No.

I try to buy the best quality, wild caught, sustainable seafood I can find, but the good selection varies so the type of seafood we eat varies greatly.

As I was perusing my local Whole Foods they were just unloading these great looking scallops so i scooped a few up for lunch that day. I am so glad I did!

Why?
Because they were great...and they sure looked good...


Seared Scallops with crispy potatoes, asparagus & garlic, brown butter, white wine sauce
1 pound scallops
3 small purple potatoes, sliced
1 small asparagus bundle, bottom third trimmed off
1 cup white wine
3 cloves garlic, minced
1 shallot, minced
4 tablespoons butter

Heat olive oil in pan over medium high heat
Add sliced potatoes and cook until about half way done
Flip potatoes and add asparagus and 1 tablespoon butter
Cook until asparagus is tender and potatoes are crispy

Heat olive oil in a cast iron pan until hot
Rinse and pat scallops dry...water and oil do not mix people!
Season scallops with salt and pepper and place flat side down in pan
Sear until a brown crust forms, about 3 minutes
Turn and continue cooking until other side is seared and middle is just opaque and cooked through (about 2 minutes)
Remove scallops, set aside
Reduce heat to medium
Add 3 tablespoons butter to pan and cook until slightly brown
Add garlic to butter and cook until slightly brown
Add wine to pan and reduce sauce by half
Season with salt and pepper
Slide scallops back into pan just to warm

Plate potatoes and asparagus first, top with scallops, pour sauce on top... Enjoy!!

Happy Eating...

Thursday, April 18, 2013

Totally Tortellini...

Tortellini... litte ring shaped pasta. So fun. So small. Perfect for chubby little fingers to grab and pop in their mouths... oh and toddlers like them too :)

fill them, stuff them, leave them plain...so versatile, so EASY! no really, i promise it is!
Still don't believe me... here are the dough ingredients


Yup..thats all folks! I make my dough in the food processor.
My family does not eat white flour so my pasta dough is made with 100% whole wheat pastry flour, 2 eggs, salt, olive oil, ice water (and optional herbs to make an herbed dough)


Forgive the photo overload that will follow, but I am a visual learner so for any other visual learners out there...here is tortellini making in a step by step process.


I used herbes de provence along with oregano to make an herbed pasta dough, this is totally optional. You can make plain dough as well..I just love flavor throughout the whole dough. After I added my herbs I blend up the flour, salt with them. I slowly add in the olive oil and water. When you first dump out the dough you may freak out...DON'T! As you knead it, it will form a nice ball. Working with whole grains means your dough will be firmer, stiffer and harder to roll. Just use some of your lovely muscles and roll it out until its pretty thin.

Now, the fun part. Forming the little guys. More pictures to follow.


That is a pretty fantastic filling I've got in there by the way... here it is
Homemade ricotta cheese, spinach, roasted butternut squash, freshly grated nutmeg, salt & pepper...YUM!!!!!
 
Anyway.  Spoon some filling (or use some freshly grated cheese pinched together) in the center of your circle of dough. Wet the edges and fold over the dough, pinch and seal really well. You can stop here and have little ravoli's too, pasta is fun!
 
If you want to continue in the tortellini process, take that little half circle and wrap it around your finger, bringing ends together, overlap, wet and seal shut tightly. Using your other hand, start to push the top edges down, tucking the ends under. Flip over the pasta as you take it off your finger and you will have a neat little ring shaped pasta!
 
Go on, go impress your family, friends, yourself at what you just made!
 
I also made a quick 2 minute you tube video walking you this process. You will forgive me for the fact that I talk fast, have an open pantry door, no makeup on and my hair is not done right?! Awww, i  knew you would.

http://youtu.be/MKLmggw6ROg  (direct link in case the video will not play from this page)
 
Fresh Pasta Recipe
2 cups whole wheat pastry flour
2 eggs
1 tablespoon olive oil
5 tablespoons ice water
1/2 teaspoon salt
* 1.5 teaspoons dried oregano (optional)
* 1 tablespoon dried herbes de provance (optional)
 
Happy Eating...


Wednesday, April 17, 2013

To Bean or Not to Bean...


I am from New York... Before I moved to Arizona I am not sure i knew what chili was. Or chiles. Or green chiles.

Now that I live in the southwest I have come to love chili... its spicy, smokey, and completely adaptable...and apparently worth getting into fights over. I mean beans are a lot of things, but a controversial ingredient is not one description I would have given them. Apparently to bean or not to bean is indeed the question (i'm sorry, so sorry for that)


Any hoo.... This in one version of chili that makes a regular appearance in my household, its one of the hubsters favorites...

White Chicken Chili with Herbed Sour Cream and Cilantro Oil

Cilantro Oil
In a small blender or magic bullet type of appliance blend together 1 tablespoon olive oil, dash salt and a handful of cilantro. Slowly add in more oil until it runs together smoothly (just be careful, too much oil will make it taste like...um well..oil. A larger blender may not handle this task well unless you make a big batch)
Transfer to squeeze bottle to make pretty designs...or not :)

Herbed Sour Cream
Stir together 1/2 cup of sour cream with 1 tablespoon chopped cilantro
Transfer to squeeze bottle or ziploc bag with corner cut out to make pretty swirls...or not :)

White Chicken Chili - 4 - 1.5 cup servings
2 boneless, skinless chicken breasts cubed
2 cans white beans (i used cannelini and great northern), drained & rinsed well
1 small can diced green chiles
1/2 white onion, diced
2 garlic cloves, minced
1 tablespoon olive oil
1 tablespoon ground cumin
2 teaspoons chili powder
1 teaspoon dried oregano
1 teaspoon dried thyme
1 teaspoon garlic powder
salt & pepper
1/2 lemon
approximately 2 cups of sugar free vegetable or chicken stock ( i used trader joes hearty vegetable broth...***Side Note*** I find the type of broth you use will make a HUGE difference. I have not liked any better than the Trader Joe's Brand.)

In a dutch oven add in olive oil over medium heat, when warm add in onions and cumin. Saute until trasnparent, add in garlic and green chiles. Cook until garlic is fragrant but not dark brown.
Place diced chicken breasts in a large ziploc bag, add dried herbs/spices and mix well to coat chicken. Add chicken to pan.
Add in 2 cups of liquid as well as the 2 cans of beans. The liquid should cover all of the meat, chiles and beans. Depending on your pot, add more liquid as needed. Add juice of 1/2 of a lemon. Bring to low boil, reduce heat to low, cover and cook until chicken is white all the way through. Check occasionally and add liquid to your liking. More = soup; Less = stew. I cook mine on low for about 20 minutes and usually add in some extra spices...but i think i singed all my taste buds off so that is just me.

Top with herbed sour cream, cilantro oil and if you feel especially culinary crazy...some toasted pepitas (just pumpkin seeds).

Happy Eating...

Super Salad


I will admit it...I am NOT a salad as a meal girl :/
 
I try, I try hard, to love the idea of salads as a complete but in the end, no matter if i absolutely LOVE the salad i'm still hungry. I know this is completely a psychological thing...
 
However, every once in a while a salad comes along and something clicks. yum.... yum...yum....
I'm full, well not my dessert stomach, that's always hungry ;)
 
Super Salad
1-2 cups fresh lettuce (i used romaine and spinach, use whatever fresh washed lettuce you have)
1/4 cup organic pea shoots
2 table spoons chopped raw walnuts
1/4 cup sliced strawberries
2 tablespoons sliced shallot
1-2 tablespoons crumbled blue or gorgonzola cheese
1/2 cup sliced green apples
1-2 tablespoons olives
1 poached egg (pictured below)
Lemon Herb Vinaigrette
 
Lemon Herb Vinaigrette
Juice of 1 juice lemon (when you pick it up, it should feel heavy for its size)
2 tablespoons good extra virgin olive oil
1 tablespoon dried or 2 tablespoons fresh herbs - I used a mix of thyme, rosemary, oregano, red pepper flakes, salt & pepper
1 garlic clove, minced

Mix all ingredients except olive oil, slowly add in oil while stirring to blend.
 
This salad is super...feel satisfied, no need to eat a second dinner kind of satisfied. Trust me, i'm not a salad girl afterall.


Poached eggs and LOVE :)

My husband works hard.... like REALLY hard to provide for our family.

We made the decision that I would leave my job, God provided a raise for my husband that pretty much equaled my salary (a part time kindergarten teacher...so no, the raise wasn't all that much, ha!), and now his is our only income.

My husband builds rockets...no really, seriously, being a rocket scientist is real! I know, i didn't believe it either. When he has an upcoming launch he may be at work for 12-14 hours 7 days a week until the rocket goes boom up into space. So yes, he works hard.

I love to cook
I love my family
I show my love, in part, by nourishing their bodies with food...
thus, i woke up extra early to cook my hubby this breakfast and send him off into another day full of rockets.

Ingredients & Recipe

1 slice bacon (i used trader joes uncured applewood bacon)
1 egg ( I used trader joes organic brown eggs) - use the freshest egg possible
1 slice bread (I used alpine valley organic 12 grain whole wheat bread)
a few spears asparagus - washed, botton third portion trimmed off
salt, pepper, spices to your liking

Cook bacon until about half way to your desired doneness (that is not a word...)
add in asparagus spears, a small drizzle of olive oil or small pat of butter and finish cooking bacon until it is a crispy as you would like and asparagus is tender.

Meanwhile, bring a half full saucepan of water to a simmer (not boiling)
Add in a tablespoon of white vinegar
with a wooden spoon or whisk, stir until you have a whirlpool like effect happening
Crack egg into small bowl and gently slide egg into center of whirlpool of water
Continue stirring so that the white of the egg forms a tight oval around egg
Cook approximately 4 minutes, you want whites firm but yolk still runny
Remove egg, trim off any straggly parts of the white

Toast bread, if you really love your husband you can cut out your bread in a shape of a heart :)

Plate bread, top with asparagus spears, poached egg, and bacon slice

Give hubby a big smooch,send him off to work, rush back to bed for those coveted 3 and a half minutes of sleep before alarms 1 & 2 (also known as kidlet Madisyn and kidlet Conner) go off.

Happy Eating...

Morning Power Smoothie


I like to get up before my kids wake up.

I know I should just sleep until they wake me up, but if this happens I feel out of sorts all day long. So, I wake up about 30 minutes before I know my littlest kidlet will wake up. I like to wake up, stretch for a minute, allow myself to actually wake up and head out to the kitchen.

I always have something for breakfast...always.

I just don't always have time to make or the appetite to eat a huge breakfast. I also do not want to start my day filling up on empty sugar or carbs that mess with my blood sugar and lead me on the really slippery path to eating wrong all day.

On days like that, I need something that is going to fill me up, taste amazing, keep me going through my morning spin class, and is fast!

Morning Power Smoothie

1 banana - frozen and sliced into coins
1/2 cup plain greek yogurt ( I use full fat)
1 cup orange juice - if you have a juicer, fresh squeezed is best
1/4 cup pineapple or plain apple
1.5 cups spinach - washed and dried - kale is great too - just remove the tough stem
1/2 cup strawberries or raspberries
1/4 cup blueberries or blackberries
1 tablespoon chia seeds, black or white
1 teaspoon flaxseed meal
1/2 teaspoon vanilla extract

** Sometimes I will add in raw, vegan, plant based protein powder if I am drinking this after a really tough workout. You can also change the fruits, add more veggies, sub water for the OJ. **

blend, sip, feel AMAZING all day!!!

Yum! Don't let the color fool you, this is amazing!
How pretty is this!


Tuesday, April 9, 2013

It's on....

I have a blog.
Yup, I blog now.
Yes, me, that's right....

So now what?!

This blog is all about feeding those I love. Food. Feeding them food.
Food is how I love. I love to cook and know that what I am feeding my family and friends nourishes their bodies...and just maybe their hearts too.

I believe food should be whole, real food and as close to what it was intended to be as possible. Except cupcakes...cupcakes can come in any form and I will eat them.

I hope you come with me on a little food journey, and i hope you are inspired to feed those you love too.