Tuesday, November 12, 2013

Dessert for Breakfast...Part 2 (peanut butter & jelly muffins)

So last time we were talking about the absurd amount of sugar in traditional breakfast 'pastries'...
43 grams in ONE pastry... um no way! Sugar crash central right there... There is just no way that eating something with that much sugar can set you up to be your best all day.

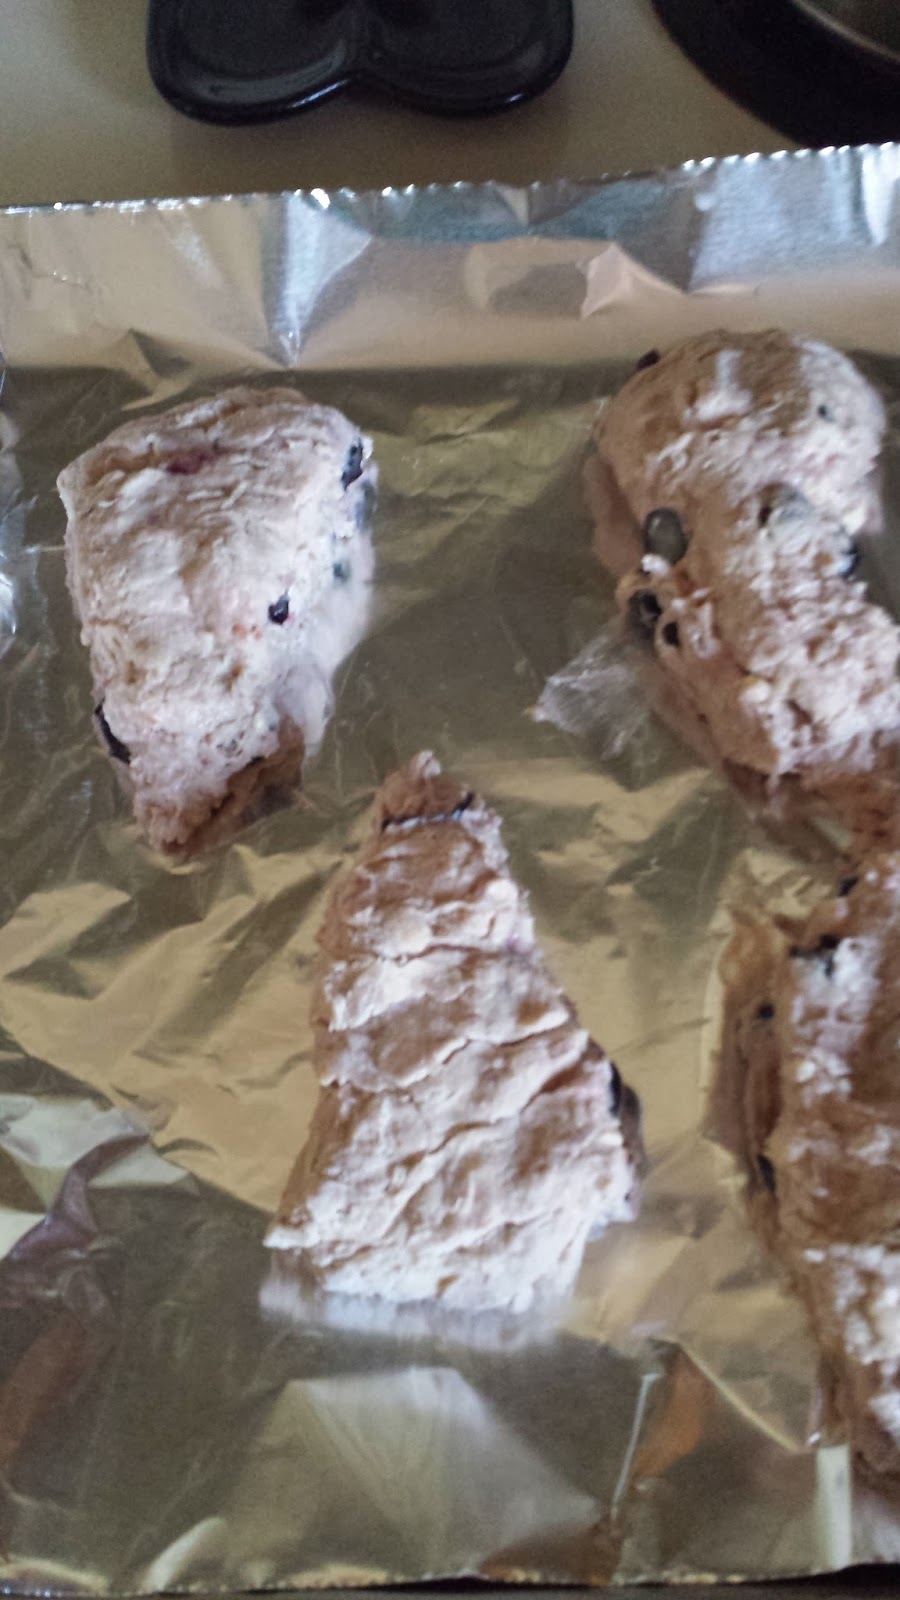
I made the whole wheat blueberry scones last time that are amazing, with only 5 grams of sugar in one, and all of it coming from naturally derived ingredients like honey and maple syrup.

Today it's a muffin.... the good old muffin....
Back to that one coffeehouse what is on every corner...ONE muffin there packs almost 30 grams of sugar in ONE muffin.

We like to think that muffins must be a good choice for us, but too many times they have the nutritional profile of a dessert, not a healthy breakfast food. They can be high in sugar and carbs but offer little to no protein; leaving us with a sugar high but starving because they have no staying power.

So how do we make a good for you muffin that tastes amazing, is low in sugar, uses 100% whole wheat, and is packed with protein.... oh and taste good so the little munchkins will eat them :)

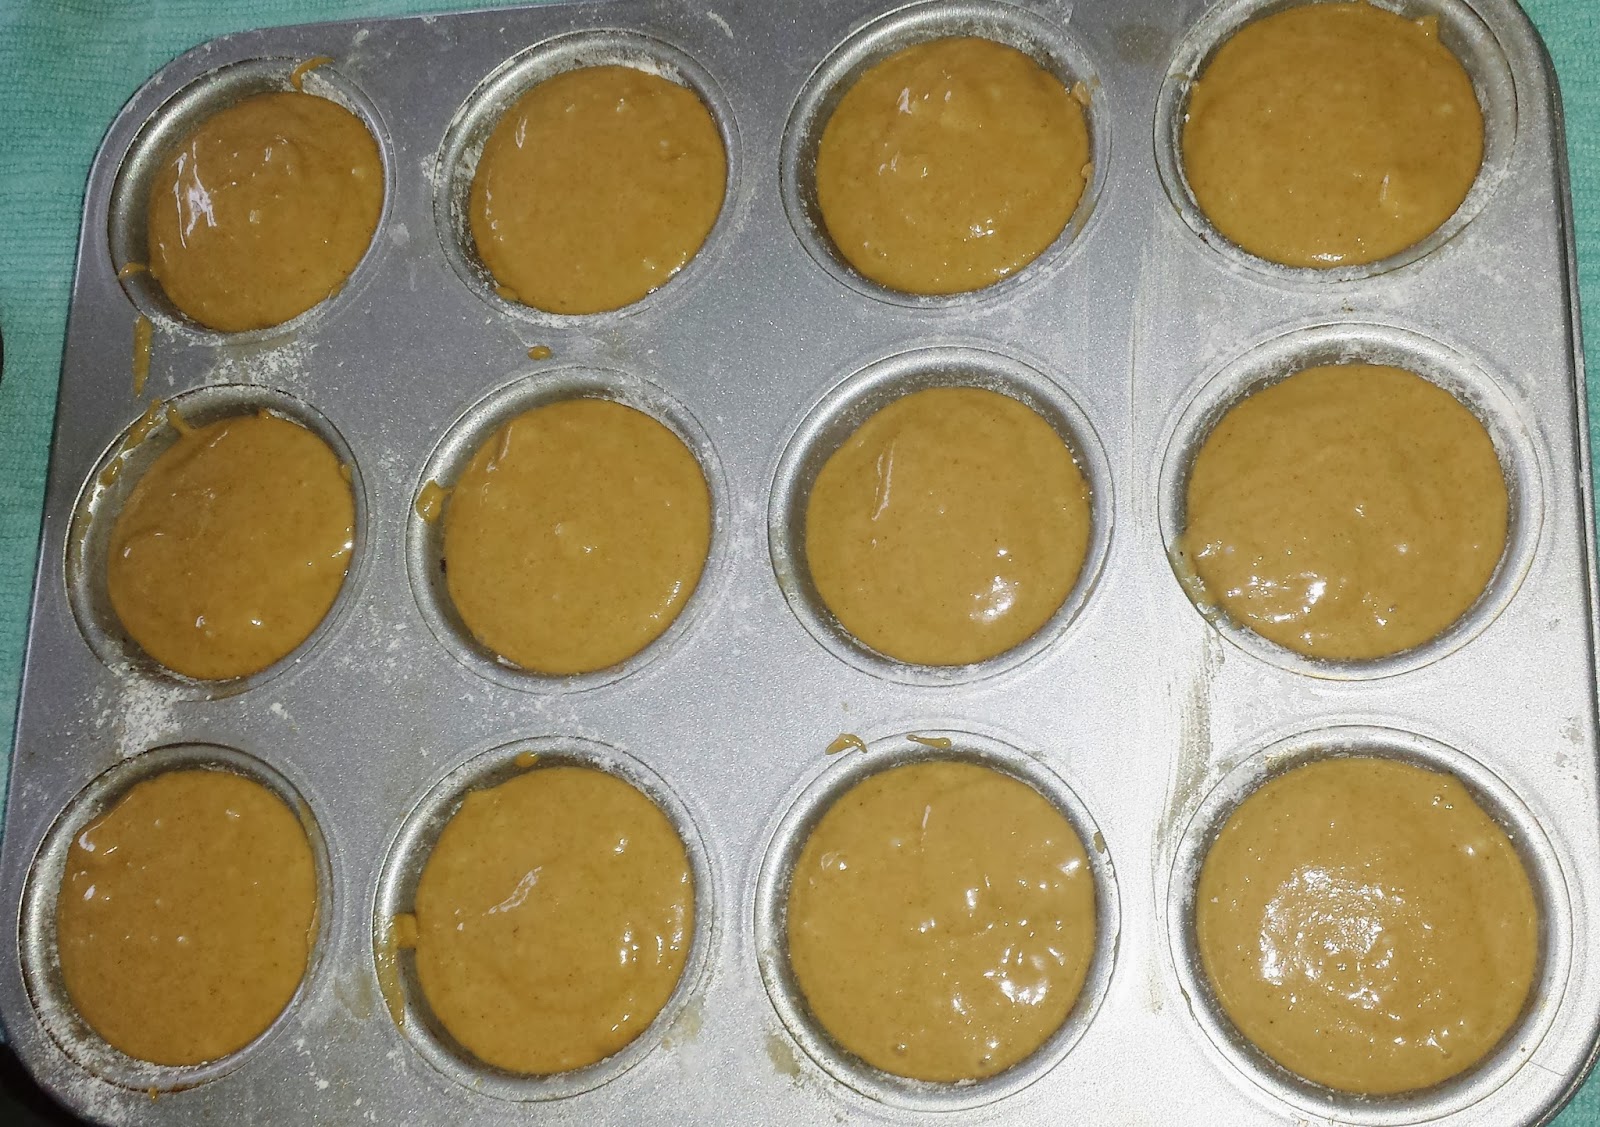
Peanut Butter & Jelly Muffins!!

Yup, you heard me... Peanut Butter & Jelly!

Whip up a batch of these yummy, healthy, filling muffins  (make sure to freeze some for a quick breakfast on the go), and be prepared to feel amazing all day long because you started your day off right!

Oh and remember that one muffin we talked about earlier with almost 30 grams of sugar - one of these muffins comes in at 9 grams of sugar...including the honey, maple syrup and jam! Not bad considering 1 glass of orange juice has about the same. Keep in mind that this sugar is 100% natural! Raw organic wild collected honey, pure maple syrup and fresh fruit only jam.

Peanut Butter & Jelly Muffins
Recipe adapted from here

1.5 cups whole wheat pastry flour
1 tsp baking soda
1 tsp baking powder
1/2 tsp salt
1/3 cup coconut oil
1/4 cup honey
1/4 cup pure maple syrup (not pancake syrup or flavored syrups)
1/2 cup buttermilk (or 1/2 cup milk with 2.5 tsps white vinegar or lemon juice and let stand 5 mins)
1/2 cup almond milk (or regular or coconut or soy, etc...)
1/2 cup plus 2 tablespoons peanut butter
1 egg
2 tsp vanilla extract
12 -14 teaspoons of jam


whisk dry ingredients together, set aside in a separate bowl

In the bowl of a standing mixer, or in a bowl with a hand mixer, mix together the wet ingredients, EXCEPT for the jam, leave that aside.


Add wet to dry and mix slowly, just until everything is incorporated. Do not over-mix or the muffins will become tough.


Set batter in the refrigerator for about 10 minutes and preheat the oven to 350.
Grease and flour the 12 cups of a muffin tin and set aside

After 10 minutes in the refrigerator, gently mix the batter and then use about 1/2 of an ice cream scoop to cover the bottom of each tin, place just over 1 tsp of jam of your choice in the middle, and then cover with an additional 1/2 scoop of batter. You want to make sure there is enough batter on the bottom so that the jam doesn't hit the metal, and again enough to cover the jam completely. If the jam is exposed and hits the metal, it will caramelize and stick to the tin - ask me how I know ;)


Bake at 350 for about 20 minutes. LET COOL, I know, I know, this is the hardest for me too, but the jam needs a few minutes to set up.


Eat, feel great, feel full, live life.... Happy Eating!

Thursday, October 24, 2013

Dessert for Breakfast?!

I love dessert. I think I may have an unhealthy love of dessert. Don't judge me ;)

As my family has transitioned over to whole foods, or no processed foods, we have made the switch from traditional processed sugars to using honey or pure maple syrup instead.

These are fantastic sweeteners that you actually need LESS of for the same amount of sweetness, but best yet, they are 100% natural. Nothing added, nothing stripped, just plain from nature sweet :)

This is good news for people like myself who love dessert but do not want to use the processed kind of things most desserts call for...

So let's talk about what I like to call "dessert for breakfast"

Muffins, Scones, Cinnamon Rolls.... These are breakfast foods.... have you ever stopped to look at the sugar content of these 'breakfast' items... I did.... BIG mistake!

Let's take a look at  at a very common, on every corner coffee shop whose name shall not be written here:

Pumpkin Scone - 480 calories and 43 grams of sugar?!?! in ONE scone... what a way to start the day, sugar loaded!

What's that? You would like to know more and have it all ruined every time you walk in there again to order one of these "breakfast" items... SURE!

Blueberry Muffin - 350 calories and 29 grams of sugar
Cinnamon Roll - 420 calories and 32 grams of sugar
Coffee Cake - 390 calories and 31 grams of sugar

To me this is crazy! After not eating all night (for some of us), we then wake up and immediately put obscene amounts of sugar into our bodies as the first fuel it gets. We then wonder why we spend the day with headaches, stomach aches, sugar crashes...

I, too, love muffins, scones and cinnamon rolls and decided I would not just say well I guess I am out of luck and will never have one again. Nope, I decided to make better versions!

This will be a 3 part series of healthy breakfast alternatives to those crazy sugar filled breakfast bombs..

Up First

Whole Wheat Berry Scones (with pure maple syrup as the only sweetener) topped with a lemon glaze (skipping the powdered sugar and subbing in raw organic honey)

Heavenly!! Doesn't that look amazing!


Let's Get Baking!! Recipe adapted from here

Whole Wheat Berry Scones

3 cups whole wheat PASTRY flour
1.5 tablespoons baking powder
3 tablespoons 100% pure maple syrup ( this will make each scone only 5 grams of sugar! Remember that other scone sitting at a whopping 43 grams?!)

1/2 teaspoon salt
5 tablespoons cold butter
zest of 1 lemon
1.5 cups mixed berries (I used raspberries and blueberries)
1/2 cup plain greek yogurt
1/2 cup almond milk (you can also use regular milk)
1 teaspoon pure vanilla extract

Instructions

Preheat oven to 425 F

Combine flour, baking powder and salt in bowl of food processor, pulse together and then add maple syrup

Add cut up COLD butter


Pulse until sand like consistency, or until butter is still in small pea size chunks (and nope that is not my hand that looks like an old mans.... no way at all :/)


Zest your lemon (avoid the white bitter pith part and just get the yellow goodness)

Empty flour mixture into a bowl, add zest and berries to your flour


Stir gently, add vanilla extract, milk and yogurt

Mix until yogurt is combined and let sit in refrigerator for 15 minutes (when using whole wheat to bake, you need to allow time for the liquid to be absorbed by the flour mixture and keep the butter cold)

After dough has sat for 15 minutes, turn it out onto a very well floured surface and begin kneading gently... you don't want to crush the berries too much - it will be wet... keep your hands covered in flour as well as the surface to help prevent sticking. Knead a few minutes until it starts to stick together more and look less wet... you will be tempted to add more flour. Add very small amounts at a time, it WILL start to come together :)


Once dough is holding together more, and sticking less to surface, divide into 8 wedges - or use a floured biscuit cutter to cut into rounds.


Line a baking sheet with parchment paper (I was out so I used foil... I recommend parchment paper)

Bake about 15 minutes or until the tops are light brown, over baking will dry these babies right out.

Top with lemon glaze or greek yogurt

Lemon Glaze
(1 tablespoon raw honey and 1 tablespoon lemon juice, mix, taste, add more honey to your taste and drizzle over scones.


These freeze well - just wrap tightly and freeze. Toast in oven for a few minutes.

Happy (low sugar, healthy, whole grain) Eating :)

Monday, September 23, 2013

Best of Autumn Bisque

Its officially Fall...

For most this would mean the weather turns crisper, leaves start to change colors, apple orchards open and maybe even jackets and hats would be donned...

I live in Arizona. Fall is a lie. A big fat lie.

For me Fall means temperatures hover in the low 100s, maybe even dipping into the 90s and evenings are 70s-80s. We still get our pumpkins but we do it in shorts and tank tops. We may even open windows and cook soup, while cranking the air to 70, it's normal here.

Today I did just that, I opened the windows to get some somewhat tepid air flowing through the house...it was only 90 after all, and found myself staring at a butternut squash I scored from the local farmers market and the half of the canned pumpkin in the fridge. What could I do but make soup. I first closed those windows, turned the air down, put on a tank top and covered myself with a damp towel in preparation, but darn it, I was going to make soup!

...And not just soup. Hearty, filling, but still good for you healthy bisque.


Yes, she's beautiful...and yes it's a she :) Hearty, filling, a meal in a bowl that leaves you satisfied... while still being whole, real food, healthy, figure friendly and amazing tasting. Best of all worlds!
 
Best of Autumn Bisque
1 medium butternut squash, peeled, seeded and cut into cubes
2 small shallots, or 1/2 of 1 large sweet onion
1 medium apple, peeled and cut into cubes
1 large carrot, peeled and cut into chunks
1 large stalk celery, cut into chunks
2 cloves garlic, sliced or chopped (not minced or it will burn)
3/4 cup pumpkin puree - plain pumpkin, not pumpkin pie mix
3/4 cup half and half
1/2 cup plain Greek yogurt
2 cups chicken or vegetable stock
1 tablespoon pure maple syrup
2 tablespoon fresh sage, chopped (or 3 teaspoons dried)
1 tablespoon dried oregano
2 tsp ground cinnamon
2 sprigs fresh thyme (or 2 teaspoons dried)
2 tsp salt
2 tsp pepper
2 tablespoon coconut oil, divided into 2 1 tablespoon portions
1 tablespoon butter
 
Roast cut, peeled butternut squash for 40 minutes at 350 degrees with 1 tablespoon of coconut oil, 1 tablespoon fresh sage (or 1.5 tsp dried), 1 tsp salt and 1 tsp pepper
 

During last 10 minutes of squash roasting, combine remaining coconut oil plus in a heavy skillet, cast iron if you have it.
Add in carrot, celery, shallots (or onion), oregano, thyme, sage, salt and pepper. Sauté 7 minutes.
Add in apple, cinnamon and garlic, sauté 3 minutes (watching garlic to make sure it doesn't burn)
Remove butternut squash from oven and add it, plus oils and herbs, directly to the pan.


Add in pumpkin.


 Add chicken stock, stir to combine, and bring to a simmer, then reduce heat to medium low

 
When mixture is reduced to medium low, add in half and half plus yogurt and give it a good stir. This is a good spot to taste the soup. Re-season with salt pepper and additional herbs if you would like.


Cook about 5 minutes, stirring every minute or so, and then transfer to a high speed blender to puree. You can also do this with an immersion blender, but I would cook this soup in a stock pot instead so it is deeper. You can also use a food processor, but the soup will be a bit more chunky, not a smooth puree.
 
Add in maple syrup, and blend about 5 full minutes on high speed, stopping it and checking every minute or so and stopping when you have reached your desired level of smoothness.
 
 
Taste, re-season if desired and then serve directly into bowls. You can also cool this down and freeze in individual portions at this step, this bisque freezes very well.
 
Garnish with Greek yogurt and maple syrup, if desired, and ENJOY! Enjoy the cooler fall temperatures, or if you live in Arizona turn your air down and pretend it is cooler outside :)


Happy Eating!


Monday, September 16, 2013

The F Word

The F word.....

Hey, get your mind out of the gutter now, I'm talking about the F word 'Fat'.

When I was younger I really did not understand what calories truly were. In my mind they were just something to eat less of so that I wouldn't gain weight. I never really thought of them as what they truly are - energy.

Much like a car, our body needs fuel to run. Also like a car, it we put inferior or poor qualify fuel into it we will see an impact in they way it runs. Our body works very similar, we can put good fuel into our bodies and have energy and feel great or we can put inferior fuel into it and feel sluggish and cruddy.

The energy our bodies use comes from the energy in calories from our food. I used to think that the low calorie things had to be healthy because they were low calorie. I was so wrong. There are things that are low calorie and healthy - i.e. fresh fruits and vegetables, but in general the manufactured processed low calorie items are so terribly bad for us. They are usually full of sugar, high fructose corn syrup, artificial flavors and colors and a whole host of fake ingredients to trick our taste buds into thinking it tastes good, but offer no real nutritional value or energy for our body.

This isn't a post on why I eat the way I eat or why I believe in whole, real foods and stay away from the processed junk, even if it seems that way ;) Just a little background on the upcoming "recipes" (yes I just used air quotes - you will see why in a minute).

I have been working on meal planning lately and it has helped with my grocery shopping and making sure I am using what I have and not wasting food. My problem is that I often forget to meal plan for breakfast for myself.

If I don't eat breakfast, I am a mess the rest of the day. I feel constantly hungry, and always eating, finding food that is less than ideal, filling up on sugar, etc... I need that meal in the morning to set my day on a good path, I need to fill up on quality fuel so that I can get where I need to get. I need FAT! I need fat to feel full while eating only what I need to meet my needs. If I have good, healthy, natural fat (not the processed junk fat), I feel satisfied, full, and focused so I have the energy to get through my always full days.

Now to the FOOD!! lol - "Recipes" follow - air quotes because there is little to no cooking involved!


Full Fat Greek Yogurt
mixed with chia seeds, raw almonds, bananas and a tiny drizzle of 100% pure organic maple syrup


Homemade Oatmeal

1/2 cup of raw oats simmered with 1/2 cup almond milk plus 1/4 cup water, 1/2 tsp vanilla, 1 tsp 100% pure maple syrup, 2 teaspoons apple, 2 teaspoons chopped raw almonds, 1 teaspoon coconut oil and 2 teaspoons chia seeds. This takes about 10 minutes to become creamy and cook the oats.

I topped mine with just a little chopped banana, apple, raw almonds and a drizzle of pure almond butter. So creamy, filling, tasty, healthy, simple and yes full of fat :) The good kind!! The kind that our body needs to run effectively (we NEED fat! Our bodies NEED fat to function - choose the good, healthy, natural kinds!).

Other Ideas

1 banana topped with almond butter, chia seeds and raw nuts
1 apple topped with natural peanut butter, raw honey, chia seeds
1 egg and 1 egg white scrambled with veggies, spices/herbs, and just a pinch of full fat cheese
1 slice 100% whole wheat bread (with NO sugar added) topped with 1/2 avocado, mashed, a pinch of salt and lemon juice, sliced tomato and a small side of fruit
Sweet Potato Crusted Mini Quiche with a side of fruit (cook the quiche the night before for a fast breakfast the next day or make it on the weekend if you have more time
Morning Power Smoothie
Other Smoothies - just make sure it's not all fruit - that's just way too much sugar (even the natural healthy kind can be too much when it's all we eat - we need full fat to help offset the sugars)

There are a million different combinations you could eat and feel full, energized, satisfied and you will know that you have started your day in an amazing way!

Happy Eating :)

Friday, September 13, 2013

Potato Cakes with Feta Dressing


I have learned a very life lesson.... I should not be left alone for 2 weeks with the kids... I gained 6 pounds in 12 days?! Who does that?

I would make the kids dinner but I needed to do a million other things so I would wait to eat until way late at night, which is a big no no, and of course I had to have dessert...at all times of the day :) I am used to cooking enough food for the 4 of us plus enough to have leftovers the next day...minus a person eating 2 of those portions equals a woman right here who eats like a full grown trucker :/

I've slowly started getting back in the kitchen now that I am adjusting to our new life routine...i.e. the start of school, carpools, moms meetings at church, events, classes, etc... it took me a while to figure out a new routine, but I'm on the way :)

I really have been trying to be mindful of using everything I have in my home and not just popping out to the store for an ingredient or two. I do not normally use regular white potatoes, they are not the nutritional star that sweet potatoes or yams are, but I had one lonely one and I wanted to use it.

Hello lovely potato cake...YUM!

100% 'Real' Food - all real, whole ingredients. I read labels like textbooks, so check yours to make sure your cheese is just cheese and no fillers or preservatives, same with your yogurt. I always use organic eggs and dairy products and fruits/veggies on the dirty dozen list. I want to make my meals as wholesome and nutritious as I can without having to rely on preservatives, fillers or junk. I save those things for when I hide in my closet at midnight sneaking desserts ;)

Ingredients
1 large russet potato, peeled
1 small sweet onion, peeled
1/4 cup whole wheat pastry flour
1 large egg, beaten
2 tablespoons feta cheese, crumbled
2 tablespoons scallions, roughly chopped
1 tsp granulated garlic
3/4 tsp salt
1/2 tsp pepper
1/2 tsp dried thyme
1/2 tsp cayenne pepper
1/4 tsp dried rosemary

Using a food processor's shredding disc, or a box grater, grate the potato and onion directly into a clean kitchen towel or cheesecloth. Squeeze out liquid, set aside.

In large bowl combine spices and flour


Add egg, feta and scallions and mix until an almost batter like consistency


Squeeze potato and onion mixture again over the sink to remove remaining moisture and add to egg/flour/spice mixture


Refrigerate for approximately 5 minutes, or the time it takes to heat a small cast iron pan over medium high heat with oil until shimmering. You can use a different heavy pan, but cast iron is 100% the best option for this and produces the absolute best results.

Preheat oven to 220 degrees F

When oil is hot, add half of the potato mixture and use the back of a wooden spoon to spread out mixture the diameter of a pan, about a 5-6 inch circle.


Cook about 4-5 minutes or until the potato mixture is set and golden brown on the bottom. Carefully flip and cook on second side until golden brown about 4 more minutes. Transfer to oven, add more oil if necessary and wait until it is back to shimmering. Add remaining  potato mixture, spread and cook on both sides. Remove from pan, let sit 3-4 minutes.

While potato is cooling, mix up feta dressing/dip in a magic bullet, blender or small food processor

Feta Dip (makes about 1/2 cup)

1/2 cup feta cheese
1/2 cup plain greek yogurt
1 tsp lemon juice
1/2 tsp salt
1/4 tsp pepper
1/2 tsp dried thyme
1 tablespoon scallions

Process all together and serve.

These are great for any meal! You can top with an egg for breakfast, some pulled pork or barbecue chicken for lunch or dinner, cut into wedges for a light lunch with a salad or as a side dish. Hot or cold, these are Fabulous!!

**Note, to reheat do NOT use the microwave - they will be a soggy mess :( Use the oven set to 350, and bake on a baking sheet about 7-10 minutes or until hot. **


Look at these babies!!!

Crisp and golden on the outside but fluffy and moist on the inside! YUM YUM YUM!!!


Friday, August 23, 2013

Orange Ginger Chicken

 My husband recently had to leave for a week for a work trip so it was me and these crazy little people alone :) They keep me entertained, that's for sure.


I wish I could say I was cooking up gourmet meals every night at 5pm while wearing my prettiest apron to my freshly scrubbed well behaved children sitting patiently at the dinner table...
 
Laughing Yet?? ;) Yeah, me too.
 
They did get fed, and it was all homemade and healthy, but that's as far as it went. And to be truly honest, I sat at the table while they ate relishing in the fact that I could cook later for myself and eat quietly after the kids were in bed....it's the small things, right?
 
My hubby will eat most anything I cook, but he really would be ok if he never ate any sort of Asian food ever, so I took the opportunity to cook some for myself and not feel guilty :)
 
Orange Ginger Chicken (without the husband guilt)


Yes!! It's SO good!!!
This recipe is really just for the sauce, so you could use it with pretty much any meat or vegetables. You could use boneless skinless chicken breasts - cube them, bake them, pan sear them, fry them...whatever.
 
My chicken was the good old flour and pan fry kind. I imagine pork could work well here too.
Whatever you use, I would cook up the chicken (or pork or whatever) separately and have that ready. I would transfer the meat to a plate to rest but KEEP the good pan juices to start the sauce.
 
 I think its best to prepare the sauce and then add it slowly to the meat to taste. Asian food can be pretty flavorful and the last thing you want to do is have soppy soggy sauce laden chicken...no good.
 
Orange Ginger Sauce
 
1 clove garlic, minced
3 teaspoons fresh ginger, minced
2 teaspoons grated orange peel
1 cup fresh orange juice
1.5 tablespoon sweet chili sauce
1/2 teaspoon sesame oil
1 tablespoon soy sauce (organic is recommended)
1 teaspoon oil ( I used grape seed oil but coconut or olive oil would work as well)
 
Use the pan you cooked your meat in, just transfer the meat out but keep the good pan juices at the bottom. Add the teaspoon oil and heat to medium/medium high. Add in ginger and garlic and sauté a couple of minutes until browned but be careful to not burn.
 
Add in chili sauce and grated orange peel and cook one minute more. Add in orange juice and soy sauce, stir to combine and loosen anything stuck to pan. Reduce heat to medium if not already there and cook 5-10 minutes until sauce reduces by about a third and is slightly syrupy but not sticky. Take sauce off the heat and add in sesame oil. Let sauce cook slightly and add to meat a little at a time.
 
Top with toasted sesame seeds and green onions...and sit in a quiet room and eat slowly without any guilt :)
 
Happy Eating...


Wednesday, July 17, 2013

It's been a while! Plus, Chicken lettuce wraps!

Well, um, so, yeah....

It's been a while since I have last posted... kind of wish I had a valid excuse or reason - like hey sorry I won the lottery, been traveling or man, that shark bite sure made it hard to type... but nope, just life :)

That's what great about a blog, it doesn't care if you are away for a while, it's still waiting there for you when you return - a method I would not suggest for relationships :)

So onto the FOOD!

I have been working hard to eat clean and healthy and work out diligently and it has finally been rewarding to see weight come off... I think I do better with weight loss in the summer anyway. It's Arizona, you could stand outside for a few hours and probably sweat off 3 pounds :/ But summer is the time for salads and fresh summer produce and it's just so stinking hot I don't feel like turning on the dang oven!

I have been really loving a simple watermelon, basil and feta salad...so refreshing :) I think I may have a slight problem with feta... I like it too much! If I could put it in everything I just might.

I was thinking about dinner the other night and I really didn't want to turn on the oven but I was really craving something hearty yet light - yeah, I confuse myself too :) I knew I wanted some kind of salad involved, but I also wanted something warm, but nothing too heavy or full of cream/butter.

I happened to have a package of ground chicken breast that I needed to use and I had no desire to make a meatloaf or meatballs or burgers, so I figured I would just see what else I had on hand. This is truly how most of my meals come about, I see what I have, what looks good, what needs to be used and somehow someway it will become a meal. Major successes have stemmed from this method, and some quite spectacular fails as well, but it keeps me accountable to using what I have and not being wasteful.


Don't those look pretty!! Hearty, light, warm, filling, healthy - major success :)

So as you may have realized, I am not too good with measuring, I just kind of taste as I go, but I am working on that :)

For the wrap
2-3 romaine leaves (you could sub collard greens, iceberg lettuce, etc...)

Garlic Sour Cream
Sauté 3 cloves garlic in a bit of olive oil until fragrant but not burned, transfer to a food processor or magic bullet and whirl up, add in about 1/4 cup sour cream, blend again, keep refrigerated until you use it.

Chicken Filling
1 package ground chicken breast (mine was about 3/4 of a pound)
1/4 cup chopped kale
1/4 cup diced zucchini
1/4 cup diced carrot
1/4 cup diced bell pepper, any colors
1/4 cup diced onion
2 garlic cloves, minced
salt & pepper
2 tablespoons chili powder
1 tablespoon ground cumin
2 teaspoons dried oregano
1/2 teaspoon red chili flakes (adjust to your taste - my kiddos were eating this so I kept it mild)
1 tablespoon olive oil

Heat olive oil to medium heat, add in carrots, bell peppers, zucchini, onion, all spices and herbs and sauté until vegetables are cooked but still have a bite to them (no mushy veg, ack) - about 6 minutes
Add in ground chicken, kale and garlic, cook until chicken is cooked through - about 6-8 minutes
Taste and season with salt and pepper, adding in more spices/herbs to your liking. Let simmer at low heat for an additional 5- 8 minutes to really develop the flavors (or skip this step and eat directly from the pan with a spoon)

Add to lettuce, top with sour cream and EAT!

Happy Eating

Saturday, June 1, 2013

Saucy Short Ribs

Short Ribs....


For some reason they get a rap for being really difficult, they aren't. Nope! And they are a pretty inexpensive cut of meat which is great as well. They just take time.

Something you should know about me, I am not patient. I try to be, but then I just get frustrated :) Not patient at all.

 I just do not have the time to stand in the kitchen all day babysitting food. If I did that, there would be one child or the other in the emergency room daily... My kids are dare devils and very sneaky ones at that :)

So, back to me not being patient. If I am going to cook a meal, I do not want it to be a huge production. I want to cook and get it on the table to feed my family, and I want it to taste amazing. I do not use my crockpot a lot because, although a great invention, I have a hard time being home and just seeing my food cook there and not go messing with it. See, I told you I am not patient :)

So when I make short ribs, I do so on Sundays. I am out of the house early and not back for a few hours, so when I get home, these babies are tender and delicious and best of all...Ready To Eat!

I served these delicious ones up with a cauliflower puree and crispy Brussels sprouts. YUM!!!

Saucy Short Ribs
2 pounds boneless short ribs
1/3 cup flour (I used whole wheat pastry flour)
1 teaspoon salt, 1/4 teaspoon pepper
1 teaspoon garlic powder, 1 teaspoon dried thyme

Combine the above ingredients in a zip-loc bag and shake to coat all ribs
Heat a cast iron or other heavy bottom pan to medium high
Add a drizzle of oil and wait until oil is hot, but not smoking
Brown ribs on all sides and place in slow cooker

In same pan, add the following ingredients

2 tablespoons butter (organic or grass-fed is always recommended)
1 tablespoon olive oil
1 cup chopped onion
2 large cloves, or 3 small, garlic - minced
1 teaspoon chili powder
1/4 cup sweet chili sauce (I used the trader joe's brand)
Cook until onions are transparent, watch garlic so it does not burn

Add in the following ingredients to deglaze the pan

1 cup stock (I used homemade vegetable stock, but any kind will work)
1/4 cup balsamic vinegar
1 tablespoon pure maple syrup or honey
Stir to combine everything

Pour all ingredients on top of ribs in slow cooker, set to low (8 hours) or high (4 hours) depending on your desired setting. When you take them out the meat should very easily shred/separate.

Carefully remove meat and strain the liquid into a saucepan, cook down until a thick, saucy, sticky syrup remains. Place the ribs back in the sauce, turn to coat, remove ribs to the plate with puree, top with Brussels sprouts and sauce.

Cauliflower Puree
1 small head cauliflower, about 2 cups of florets
1.5 cups whole milk, half and half or heavy cream (you can use lower fat milk, it just wont be as creamy)

Combine milk and cauliflower in a saucepan, cook on medium heat until cauliflower is very tender.
Transfer cauliflower to heavy duty blender with about 1/4 cup of liquid. Blend until very, very smooth, adding in more cooking liquid as necessary.
Season with salt and pepper as desired.

Crispy Brussels Sprouts
Trim up about 1 pound of Brussels sprouts and cut each in half
Heat olive oil in a pan until oil shimmers
Add in Brussels sprouts and cook without flipping or stirring for about 5-7 minutes, until cut side down is very golden brown
Flip and cook another 5-7 minutes without turning until this side is golden brown as well.


So if you look at this as a whole, the ribs cook themselves in the crockpot and you just spend about 15 minutes whipping up the puree and Brussels sprouts to go with it and you have a beautiful, hearty, wholesome, real food from real ingredients. YUM!!

Happy Eating :)

Monday, May 27, 2013

Mini Quiche with a Sweet Potato Crust

So it was Mother's Day...

These little faces greet me each morning...
 But on Mother's Day they greeted me just a little bit later than normal... it was the best gift in and of itself :) I mean I love my children, they are the best thing to happen to me, but man when then sleep in!

I figured I would make breakfast for the family as I do everyday, I was offered breakfast in bed, but alas I am happiest in the kitchen making food I know will nourish and fill my family. Oh, and I am a complete control freak :) There is just something about the unknown..you should see me decide on a meal at a restaurant I haven't been to.... yeah, not pretty.

These were super yummy, quick litte quiches that tasted amazing and were free from that guilty feeling you get when you realize you basically just ingested a pie crust filled with butter....for breakfast...filled with eggs and cheese....yeah.

Mini Quiches with Sweet Potato Crusts


Crusts
Par cooked sweet potato/yam or both shredded...
yup precook those babies, its really the only way to make this crust work. scrub them up, pop them in the oven and cook until they are tender with just a little bit of 'bite'left in them...don't bite them, just push on them and they should not be completely mushy.

Let the potatoes cool, peel and then roughly grate them. Press into a mini tart pan with removeable base (you can also do this in a large tart pan or even muffin tins - just grease the muffin tins or they will stick). When you are pressing in the potatoes make sure to get the whole thing covered and go up over the side edges a bit because they will shrink a bit while cooking. Refrigerate at least 15 minutes.

Precooked - i used one small sweet potato and one small yam
Bake at 425 for about 15-20 minutes. You want the crusts to brown up but not burn, so watch carefully. Remove, set aside and turn down oven to 400.

Quiche

3 eggs
2 tablespoons milk or cream
choice of fillings - sauteed for a few minutes
(I used spinach, zucchini, asparagus, bell pepper, scallions and shallot sauteed in a bit of olive oil until spinach was wilted and shallot was almost translucent)
2 tablespoons grated cheese - I used parmesan

veggies all sauteed up and ready to be used

ingredients...i think i need more color here :)
Add sauteed ingredients to the par baked crusts
mix up eggs and milk/cream, season with salt and pepper to your taste
Pour egg mixture into crusts to almost the very top
Top with cheese

Bake at 400 for about 12-20 minutes (time will depend on size of your baking dish) or until eggs are set and golden brown.

All golden, bubbly and delicious
Remove your quiche from your tart shell (if using) by placing tart pan on top of a small bowl and letting tart ring slide off.

Ahhh, look at the beautiful butter and guilt free crust
Garnish with chives or sliced scallions and enjoy :)

And thank your mom, she's pretty great.